Small update: It doesn’t look like much, but managed a good couple of hours last night on the hatch last night. Think I've broken the back of the work to get the mold up to where I want to be.
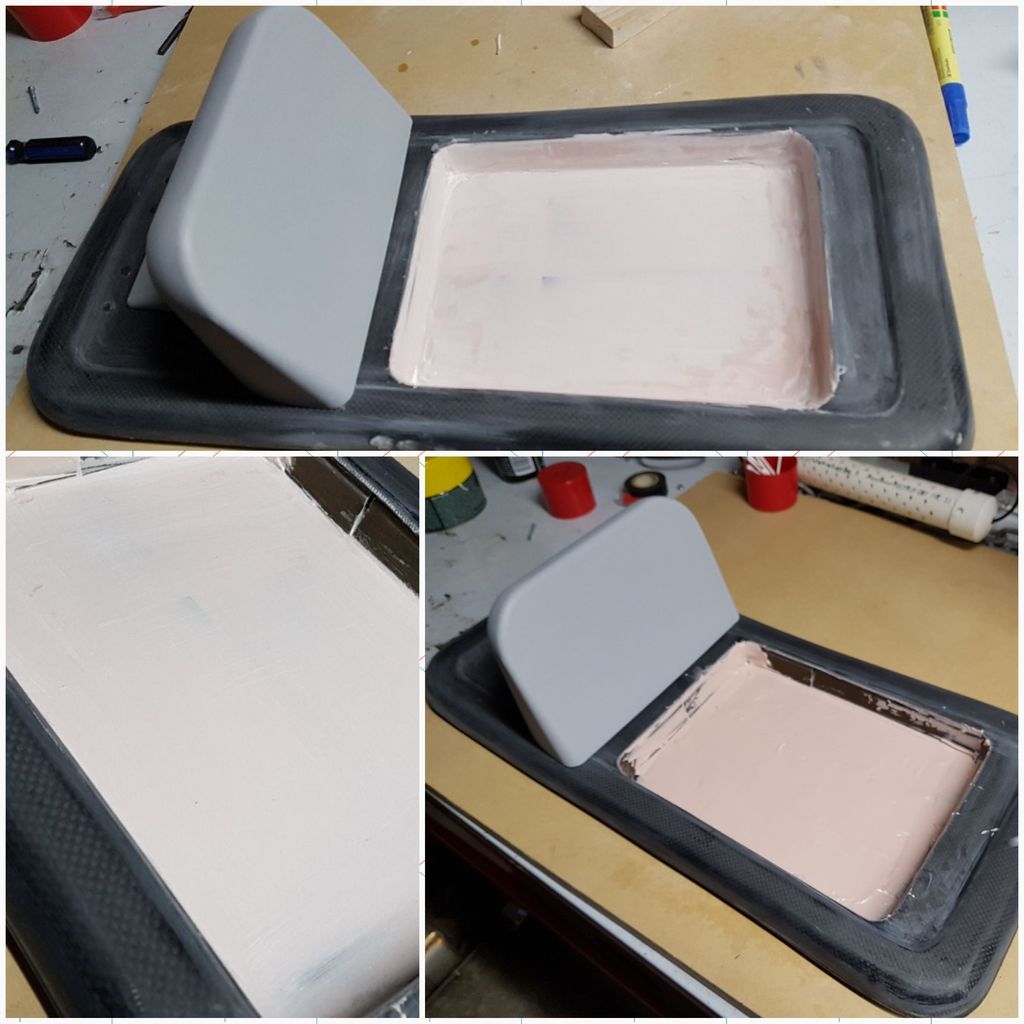
Bonded the tray together
Bonded tray to hatch
Fillered the tray and rough sanded
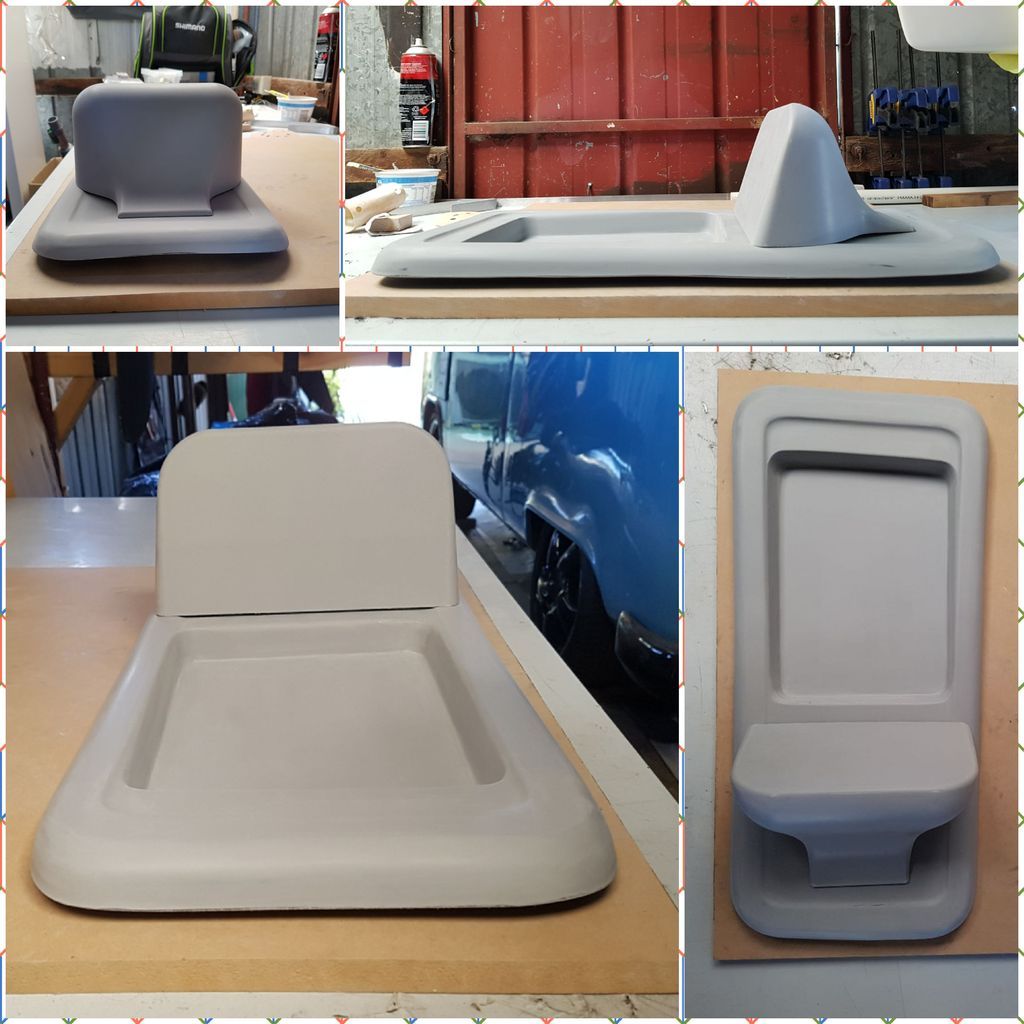
Filler primered the sounder, sanded the highs – repeat
Epoxy filled the previous screw holes
Sounder mount is good for a top coat and wet sand,
The filler work in the tray needs to be sanded a bit more to tidy up and blend around the corners, then the hatch lid and tray can be filler primed and sanded to the same standard at the sounder mount
Re: A stranger in the night
Posted: 23 Nov 2018, 12:57
by Fish aholic
It’s looking good! Any plans for a lid on the tray or will you just leave it open?
Re: A stranger in the night
Posted: 23 Nov 2018, 14:34
by Reeling
Fish aholic wrote:It’s looking good! Any plans for a lid on the tray or will you just leave it open?
Yes I'm thinking a bit of a lid with similar mechanism to the original hatch - hence the 10mm gap between the sounder and tray
I wont be aiming for watertight just something to hopefully deflect most waterspray. The lid will be simply secured with a quick release bungee similar to the aftermarket ones you can already buy for the standard hatch. I'm currently tossing up whether to make the lid slightly domed (read more effort) to increase the storage volume - obviously without interfering with vision and reaching of the sounder.
Re: A stranger in the night
Posted: 25 Nov 2018, 18:40
by Franko
Top job Nath.
Re: A stranger in the night
Posted: 25 Nov 2018, 21:07
by Reeling
Thanks Frank.
I managed to get both bits sanded to 240 grit and I'm pretty happy with how it's turned out.
I'm hoping to nip off work early on Tuesday to pop to a composite place that's been recommended to me. Want to chat to them about best ways to make the mold and what they'd suggest to use as top coat to make sure no reactions to the resin etc.
Still have to sort out the lid, but will think about this over the coming days
Re: A stranger in the night
Posted: 26 Nov 2018, 08:51
by laneends
Looking very slick Nath
Re: A stranger in the night
Posted: 26 Nov 2018, 15:40
by peatop
Nice work Nath, your going to be busy poping those out for everyone with a stealth
Re: A stranger in the night
Posted: 26 Nov 2018, 20:54
by Seasherpa
Reeling wrote:Thanks Frank.
I managed to get both bits sanded to 240 grit and I'm pretty happy with how it's turned out.
I'm hoping to nip off work early on Tuesday to pop to a composite place that's been recommended to me. Want to chat to them about best ways to make the mold and what they'd suggest to use as top coat to make sure no reactions to the resin etc.
Still have to sort out the lid, but will think about this over the coming days
Coming along nicely Nath.
In the bottom of the tray I'd add as much of a fillet as you can get away with, don't have corners you don't need its just another place for an air gap to form.
To make the mold you'll just need some tooling gelcoat, tooling resin and some 450csm.
Before you get to that you'll need to cover everything with about 15 coats of mold release wax.
Re: A stranger in the night
Posted: 27 Nov 2018, 07:51
by Reeling
Thanks all.
Seasherpa wrote:Coming along nicely Nath.
In the bottom of the tray I'd add as much of a fillet as you can get away with, don't have corners you don't need its just another place for an air gap to form.
To make the mold you'll just need some tooling gelcoat, tooling resin and some 450csm.
Before you get to that you'll need to cover everything with about 15 coats of mold release wax.
There is a slight fillet along the edges of the bottom and significantly larger fllet in the corners. It did cross my mind about making the fillets larger along the sides of the tray bottom for the exact reason of air gaps, but came to the conclusion that I wouldnt have an issue getting the gelcoat into the corners for the mold. And when I actually coming to laying the carbon for the part, this "bottom" will be a top" in the mold - if that makes sense?
I've got the part with me, so will ask the "pro's" at the shop what they think
As well as the 450 chop strand I may also go for a something a bit lighter for the first layer to avoid any print though. What do you think?
Also Eoin, while i've got you , is there a reason why the hatch lid is so thick? Is seems excessively thick given its not a structural part. Is it because the carbon lid 100% carbon?
Re: A stranger in the night
Posted: 31 Dec 2018, 09:46
by Reeling
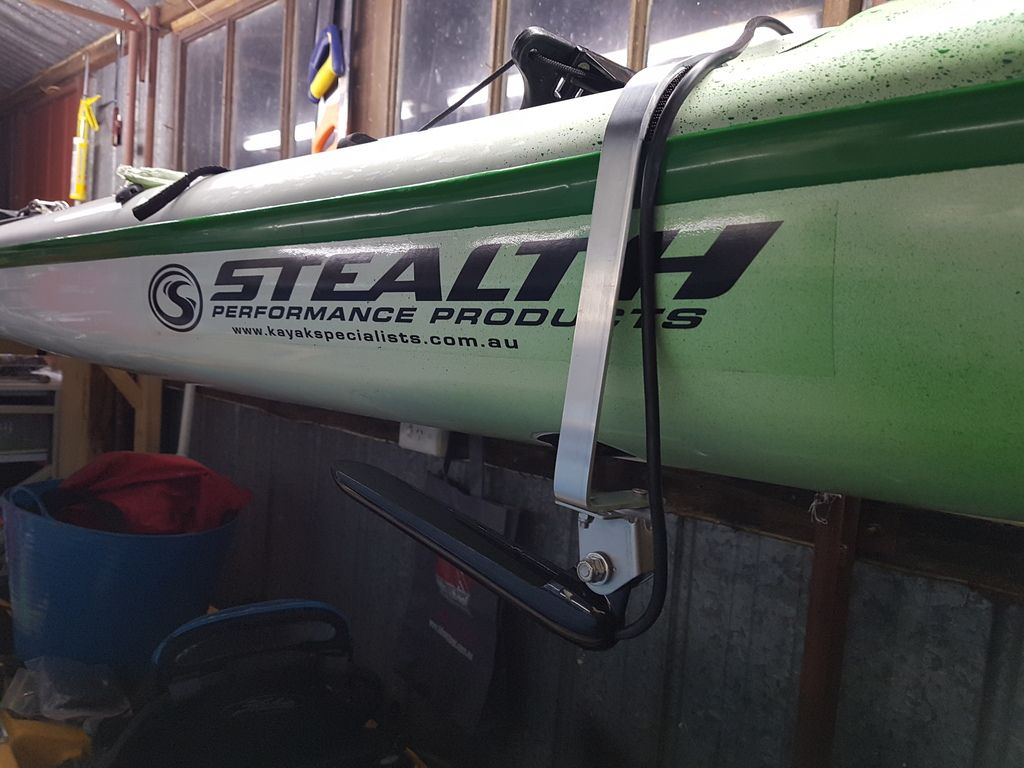
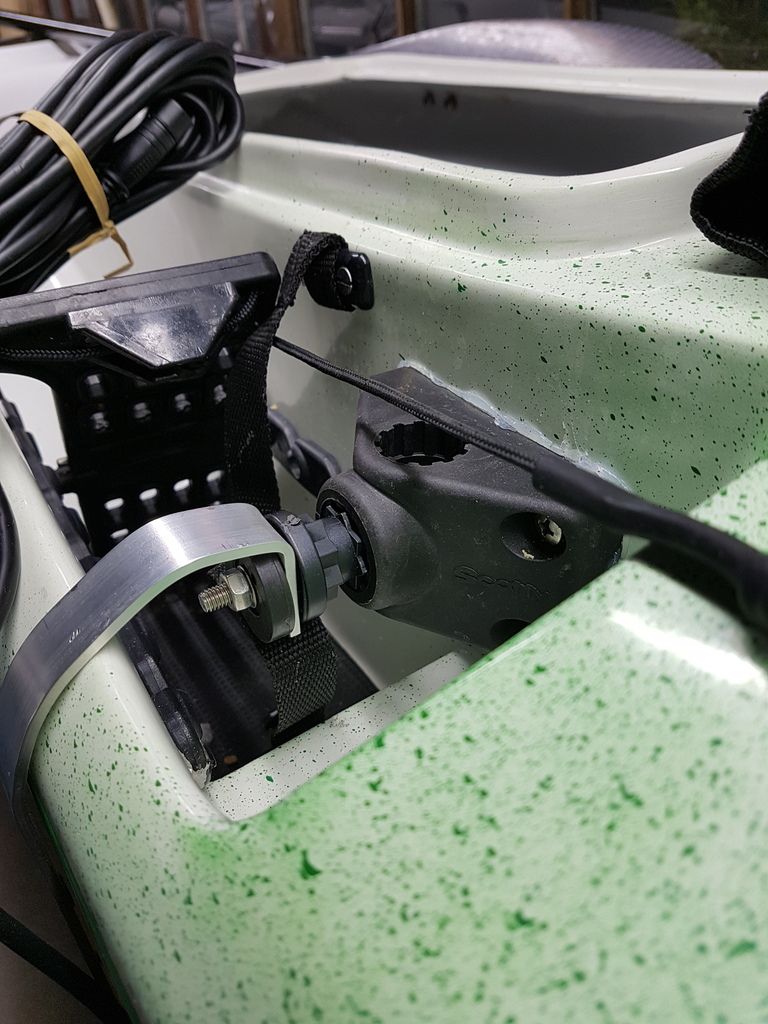
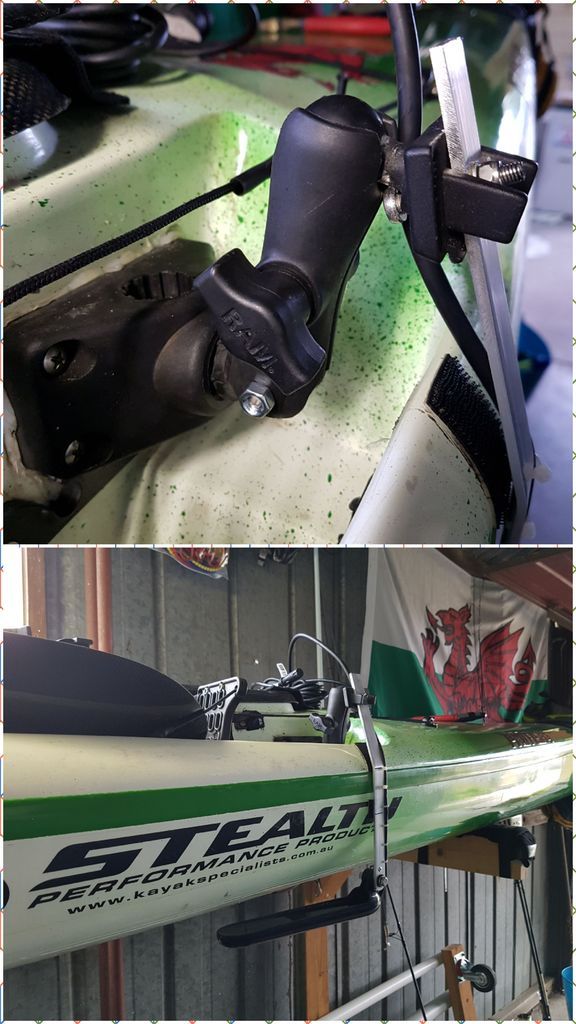
Reeling wrote:I've started making the mount for the external transducer which I pretty happy with in the end. Bagpuss offered me some advice, and although we could figure a suitable time for me to pop over to visit him, I've got a solution which I think works.
I had a railblaza mount lying arou d and it just about fits snuggly into the portion of my scotty mount that will be redundant.
This was the second attempt out of 3mm Alu flat that I had lying around. The first attempt was out of 16mm and just hooked over the rail, but being made of such thin and narrow flat, it just looked as if it would vibrate while moving...however slow
I've since adjusted the transducer angle slightly and added a small velcro strip above the yak waist line. This should put it far enough forward to see stuff I sat above and out of the way from being knocked
So, following feedback and hours on the water, I decided to try and streamline the transom mount using Shane's suggestion. I trimmed down the mount, keeping the star hole for the angle adjustment should I need it.
I took the opportunity to also remake the attachment to the scotty mount so I have raise/lower as I launch and return into the shallows.
Thanks Frank for helping me out with the scotty attachment which I wittled down to replicate a ram ball